Quick Guide to Black and White Photography Part 5 – Film Development Intro

Photo by Surreal Name Given. Licensed under CC BY 2.0
Preparing Black and White Film for Development
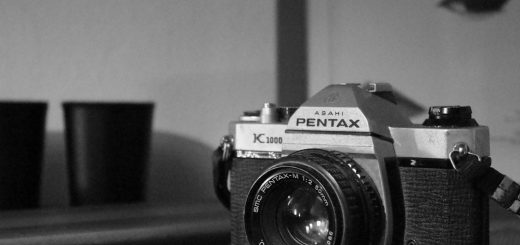
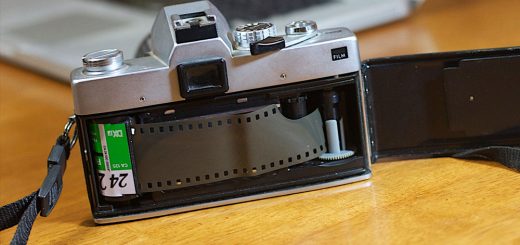
Once you finish shooting your roll of black and white film you are set to begin the film development phase. First you need to rewind the film back into the canister and remove it from the back of your camera. Here are the simple steps to unloading your film, or if you prefer there is a video that follows:
- On the bottom of your camera there will be a tiny button. This needs to be pressed in order to unlock the spindle to rewind the film. If this button is not pushed you will feel a lot of tension when trying to rewind and may damage your film or the interior of the camera.
- Locate the film rewind lever, which is typically found on the top left of the camera. There will usually be a little handle that you can pop out to make rewinding the film easier.
- Turn the rewind lever in a clockwise direction. It will take several rotations to rewind the film back into its light tight canister. When you feel the tension give while rewinding the film you are finished. You may also hear a clicking noise to indicate the film has come off the spindle.
- Open the back of the camera and pull out the film canister. If you feel it necessary you can also mark the canister to indicate that the roll has been used.
When you have the film in hand then your next step is to load the film into a light tight development tank so that it can be developed. These light tight canisters come in different sizes to accommodate a single roll of film or multiple rolls and are available in both stainless steel and plastic. A lid at the top of the tank keeps light from entering the tank during development while allowing the developer chemicals to be poured in. Along with the canister you’ll need a film reel. Film reels come in both stainless steel and plastic variety and also come in sizes for both 35mm film as well as the larger medium format film size – you want to make sure you purchase the 35mm reel. While opinions may vary, in general the metal reels feel sturdier, are a little easier to load the film after some practice and make a better investment as they aren’t prone to the same wear and tear of plastic. In addition, stainless steel tanks are better at maintaining temperature of the chemicals. So your best bet is to purchase the stainless steel tank and reel.
In order to develop the film you need to load the film onto the film reel and then place the loaded reel into the development tank. This step must be done in complete darkness. In order to get the film onto the reel you need to remove it from the film cassette/canister, so any available light will expose the film and ruin your images. It is highly advised that you practice loading a cheap roll of film onto the film reel numerous times and master it so that you can do it in darkness. Here is a video demonstrating how to load 35mm film onto a stainless steel film reel:
Before readying yourself to load the film into the development tank you will also need a few key supplies. A can opener is needed to open the film cassette/canister to get the actual film out. A pair of scissors will also be required to cut the end of the roll of film from the spindle it is attached to inside the film canister. Additionally, you’ll need to cut off the L-shaped leader of the film that was used to load the film into the camera. When rewinding the film from your film camera, if you stop rewinding the second you feel the tension stop or hear a clicking noise that may indicate the film is rewound then you can keep the L-shaped leader outside the film canister. This will simply allow you to cut the leader in the daylight while the exposed film resides safely inside the canister.
After the black and white film is loaded you’re ready to begin the development process.